
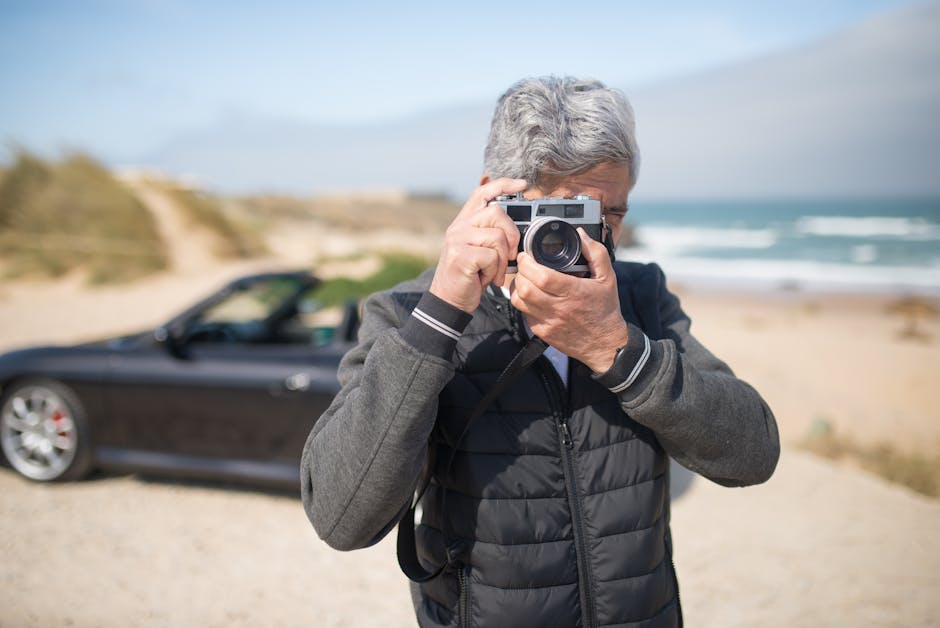
You’re at a spice market in Marrakech. Vendors are shouting, light cuts sideways through canvas overhead, and a dozen tourists are holding up phones and DSLRs. You pull out the Fujifilm X100F, flip the aperture ring to f/2, and shoot. Nobody looks at you. The camera looks old, quiet, unthreatening — and you get the frame.
That unobtrusiveness is the X100F’s most underrated travel feature. Released in 2016 and replaced twice over, it still earns a place in a travel bag for specific reasons. This guide covers how it performs in actual travel conditions, which film simulations to use where, how to configure it before your first day shooting, and when the X100V or X100VI is genuinely worth the extra cost.
How the X100F Handles Real Travel Conditions
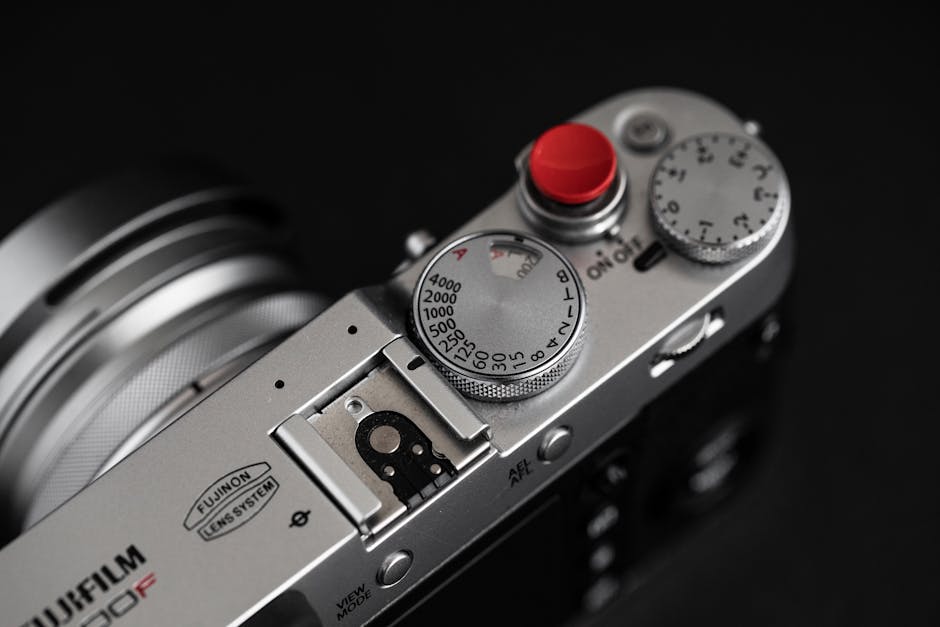
The X100F is a 24.3MP APS-C camera with a fixed 23mm f/2 lens (35mm equivalent). Weight with battery: 469 grams. That matters when you carry it for eight hours across a city. But specs don’t tell you how the camera actually behaves under the conditions travel photography produces — midday heat, dim temple interiors, fast-moving crowds.
The Hybrid Viewfinder in Harsh Light
The X100F has both an optical viewfinder (OVF) and an electronic viewfinder (EVF), switchable via the lever on the camera’s front face. Most travel photographers default to the EVF and miss the point of the hybrid system entirely.
In direct tropical sunlight — the kind you’ll face in East Africa, Southeast Asia, or the Caribbean at midday — the OVF gives you a clear, bright view of your scene when an EVF on most cameras starts washing out or dimming to compensate. Switch to OVF for street and outdoor shooting in bright conditions. You lose the live exposure preview overlay, but you gain speed and visibility. Switch back to EVF when you need to nail a tricky exposure or work in low light where the optical finder becomes less useful.
Learning to toggle between the two is one of the X100F’s genuine skill curves — and one of its real competitive advantages over cameras without optical viewfinders.
Battery Life and What to Do About It
The NP-95 battery is the X100F’s most significant travel liability. Fujifilm rates it at around 330 shots per charge. Shooting heavily with the EVF, reviewing images on the rear screen, and using WiFi transfer reduces that to roughly 200 shots in practice. A full day of active travel shooting will drain it entirely by mid-afternoon.
Carry two batteries minimum. The official Fujifilm NP-95 costs around $50. The Wasabi Power NP-95 two-pack runs about $22 and performs nearly identically in field conditions. The X100F does not charge via USB — a portable power bank won’t help you here. Two spare batteries in a small pouch is the only real solution.
Autofocus: Where It Works and Where It Doesn’t
The X100F uses contrast-detect autofocus. It is not fast by 2026 standards. In good natural light, it locks quickly enough for most travel shooting — architecture, markets, posed portraits, slow-moving subjects. In low light, it hunts visibly before locking, which costs you candid moments.
The practical workaround: learn hyperfocal distance shooting. At f/8 with the 23mm lens, the hyperfocal distance is approximately 3.5 meters. Set that focus distance manually, use the depth-of-field scale, and everything from about 1.8 meters to infinity is acceptably sharp. For street photography in a busy market or on a narrow alley, this is faster and more reliable than waiting for contrast detect to lock. Reserve single autofocus with face detection for situations where you control the pace — environmental portraits, still subjects, tourist sites.
Film Simulation Guide: Which Setting to Use Where
The X100F’s film simulations process sensor data differently — they’re not Instagram filters applied over a neutral image. Each one changes how highlights roll off, how shadows render, and how skin tones sit. Used correctly, they produce finished JPEGs that need no post-processing. Here’s how each main option performs across real travel scenarios.
| Film Simulation | Best Travel Use | Avoid When | Key Characteristic |
|---|---|---|---|
| Classic Chrome | Street, markets, architecture, documentary | Green landscapes — makes foliage olive-brown | Desaturated, slightly cool, strong shadow micro-contrast |
| Velvia | Sunsets, tropical flowers, ocean color, landscapes | Skin tones — oversaturates and reddens faces | High saturation, deep blacks, punchy colors |
| Provia (Standard) | General mixed shooting, safe default | When you want a distinct Fujifilm look | Neutral, balanced — versatile but unremarkable |
| Eterna Cinema | Overcast days, moody interiors, flat light | Bright sunlight — highlights wash easily | Flat, cinematic, gentle highlight roll-off |
| Acros | Black and white street, texture-heavy subjects, strong shadows | Color-dependent scenes | High grain, strong tonal contrast, film-like rendering |
| Classic Negative | Not available on X100F — X100V and X100VI only | — | One reason to consider upgrading |
Classic Chrome as Your Daily Default
For most travel photography — city streets, markets, people, old buildings — Classic Chrome is the best default setting on the X100F. The desaturation prevents skin tones from going orange in mixed sunlight, and the slightly cool tonal shift handles harsh midday light in equatorial climates better than Provia’s warmer rendering. Files look finished out of camera.
Set it and leave it. Switch to Velvia only when a landscape or sunset scene needs color pop. Switch to Acros when you walk into a scene that’s fundamentally about texture, shadow, and geometry — a narrow alley in Cartagena, a market in Fez, a rain-slicked street at dusk.
Shooting RAW Plus JPEG
Enable RAW + JPEG simultaneous capture in the shooting menu. Set your preferred film simulation for the JPEG. The RAW gives full flexibility in post; the JPEG is immediately shareable and serves as your reference for how the scene actually looked. The tradeoff is card space — you’ll fill a 32GB card roughly twice as fast. Bring a second UHS-I card. The X100F’s card slot is UHS-I only, so a UHS-II card won’t offer any write-speed benefit over a faster UHS-I card.
The Fixed 23mm Lens: One Verdict
The 35mm-equivalent field of view either fits how you see or it doesn’t. There’s no working around it. If you primarily shoot tight wildlife, wide interior architecture, or compressed telephoto landscapes, this is the wrong camera. For street, documentary work, environmental portraits, and general city travel, 35mm is the most natural focal length most photographers ever settle on — and the X100F’s lens is optically excellent: sharp from f/2.8, minimal distortion, genuinely beautiful wide open at f/2 for subject isolation. The constraint is the feature.
X100F vs X100V vs X100VI: Which One to Pack in 2026
The X100F launched in 2016. The X100V followed in 2026, and the X100VI arrived in 2026. All three remain in circulation at very different price points. The decision isn’t as obvious as the release dates suggest.
| Model | Sensor | Weather Sealing | IBIS | Classic Negative | Approx. Used Price (2026) |
|---|---|---|---|---|---|
| X100F | 24.3MP X-Trans III | No | No | No | $450–$550 |
| X100V | 26.1MP X-Trans IV | With adapter (AR-X100) | No | Yes | $950–$1,100 |
| X100VI | 40.2MP X-Trans V | Yes (native) | Yes (6-stop) | Yes | $1,599 (new) |
When the X100F Is Still the Right Buy
If your budget tops out around $500 and you’re shooting street or travel in dry climates, the X100F remains a legitimate camera. The 24.3MP X-Trans III sensor produces files that hold up for web use and prints up to A2. Many photographers actually prefer the X-Trans III rendering over the X-Trans IV — the grain structure has a slightly more organic, film-like quality that the newer sensor smooths out. It’s a real aesthetic difference, not marketing.
The X100F also makes sense if you’re new to fixed-lens travel shooting and want to test whether the 35mm constraint works for your eye before spending $1,000 on the X100V. If the focal length doesn’t click after 500 shots, you’ve lost $500, not $1,100.
When to Step Up to the X100V or X100VI
The X100V adds three things that matter for travel: the Classic Negative simulation, a redesigned lens element with better close-focus performance, and weather sealing with the optional AR-X100 adapter ($50). For shooting through Southeast Asia’s rainy season, Central America’s humidity, or East Africa’s dust and sand, that sealing is not a luxury — it’s protection against a $1,000 repair bill.
The X100VI adds 6-stop in-body image stabilization and a 40MP sensor. The IBIS alone changes what’s possible in low-light travel situations — dim temples in Myanmar, candlelit restaurants in Cartagena, evening markets in Chiang Mai. Handheld shots at 1/15s become reliable rather than lucky. If you’re buying new and plan to keep the camera for five or more years, the X100VI is the better long-term investment.
The Ricoh GR IIIx as an Alternative
The Ricoh GR IIIx ($999) uses a 40mm equivalent lens, a 26MP sensor, and a significantly faster autofocus system — no optical viewfinder, smaller body, better in-camera crop modes. For pure urban street shooting, it outperforms the X100F on focus speed and pocketability. For varied travel photography across different subjects and lighting conditions, the X100F’s manual aperture ring, hybrid viewfinder, and broader film simulation library give more creative range. They solve different problems. Don’t cross-shop them unless you’re willing to commit to one shooting style.
Five Settings to Configure Before You Land
The X100F’s menu is dense and disorganized. These are the specific settings that change how the camera behaves in the field — configure them before your first shooting day, not during it.
- Assign ISO to the Fn button. Press the Fn button (top right) and assign ISO from the list. You’ll adjust ISO constantly moving between bright streets and dark interiors. One button press beats menu diving every time the light changes.
- Enable face detection autofocus. Go to Menu > AF/MF > Face Detection > On. With the X100F’s older contrast-detect system, face detection meaningfully improves hit rate on environmental portraits and candid people shots — more than any other single autofocus setting.
- Set Auto-ISO with a 1/125s shutter floor and ISO 6400 ceiling. The X100F’s noise at ISO 6400 is manageable; above ISO 12800 it degrades noticeably. A 1/125s minimum shutter prevents motion blur on moving subjects in street conditions without forcing you to manually track shutter speed as light changes.
- Silence all sounds. Menu > Setup > Sound and Flash > Operation Volume > Silent. The X100F’s mechanical shutter is already quiet. Silent mode makes you invisible in markets, temples, and any situation where camera sounds draw attention.
- Save a low-light custom preset to C1. Set: ISO 3200, f/2, Classic Chrome, noise reduction at -2 (to preserve detail over smoothing). Save to Custom Setting 1. When you walk from a bright outdoor plaza into a dim interior, one click of the drive dial switches your entire exposure profile instead of adjusting three settings with cold or clumsy hands.
One Overlooked Color Space Setting
In the Image Quality menu, confirm Color Space is set to sRGB. The X100F defaults to sRGB anyway, but worth verifying — AdobeRGB JPEGs look desaturated and flat on most screens until properly converted. Keep sRGB unless your files are going to a professional print lab that specifically requests AdobeRGB.
Manual Focus for Street Shooting
Set the focus mode lever to S (single autofocus) for general travel. The X100F’s continuous AF tracking is not reliable enough to trust in a crowd. For predictable street scenarios — a narrow alley where you control your position, a parade route, a doorway you’re watching — switch the focus ring to manual, pre-focus at your expected distance, set f/8, and shoot without half-pressing. This produces a higher keeper rate than relying on the autofocus to lock in time.
The X100F rewards deliberate, considered shooting. That pace produces better travel images than a faster camera used carelessly — and it forces you to engage with a scene rather than spray it.
For most travel photographers on a budget, the X100F at around $500 used remains the entry point worth starting with. If you’re buying fresh with no budget ceiling, the X100VI’s IBIS and weather sealing close the X100F’s two biggest real-world gaps. But the core experience — the manual controls, the film simulations, the discreet profile — is the same camera it has always been.